My plans for this summer include spending quite a bit of time on the coast to get a few of the salt water species added to my tally. To that end I bought a new, used boat, it's a 16 foot, inflatable dive/rescue boat made by Mercury. I plan to spend some time in Valdez and Kenai with it, I also want to cross Cook inlet with it and spend some time at Polly reek and Crescent river, but the big expedition this year will be a trip on the ferry to Kodiak Island to spend two weeks hunting deer, brown bear and elk (if we get a permit) ducks and to especially fish all of the fresh and salt water species that Kodiak has to offer.
The major food sources for pretty much all predators is shrimp, crabs a small bait fish, I thought it would be fun to start with shrimp.

These are the first two shrimp, and the first crab.
Materials needed to tie my shrimp pattern;
Hook- Size 1-3/0 streamer, salmon fly or spey hooks
Body- .030 lead wire, crystal cactus flash chenille
Antennae- 30 Lb. red mono.
Legs and Cilia-pearlesent flashabou, hackle feather (your choice of color)
Claws- pearlesent mylar film
Shell- pearlesent mylar film or scud back
Eyes- black glass beads or 30 Lb. mono melted to form eyes.
Rib (tail segments) brass or copper wire


To begin, bend a dog-leg in the hook near the eye, this gives the finished fly a pleasing, realistic look.

The lead wire is wrapped from the start of the hook-bend almost to the eye. I used head cement to secure the weight real good, all the salt water species are quite toothy and will need well tied flies. You can vary the size of lead wire and the amount of it depending on how deep you need to fish. Most of our sport fish in Alaska are found quite deep so I'm loading on the weight.

Prepare the claws and the antennae, I cut the Mylar film with scissors and bend the mono. by carefully heating it with a lighter. The claws and antennae should roughly be about as long as the hook shank.

Tie in the claws and the antennae just behind the lead weight...

then the flashabou. It's helpful to tuck the antennae into a material holder to get them out of the way.
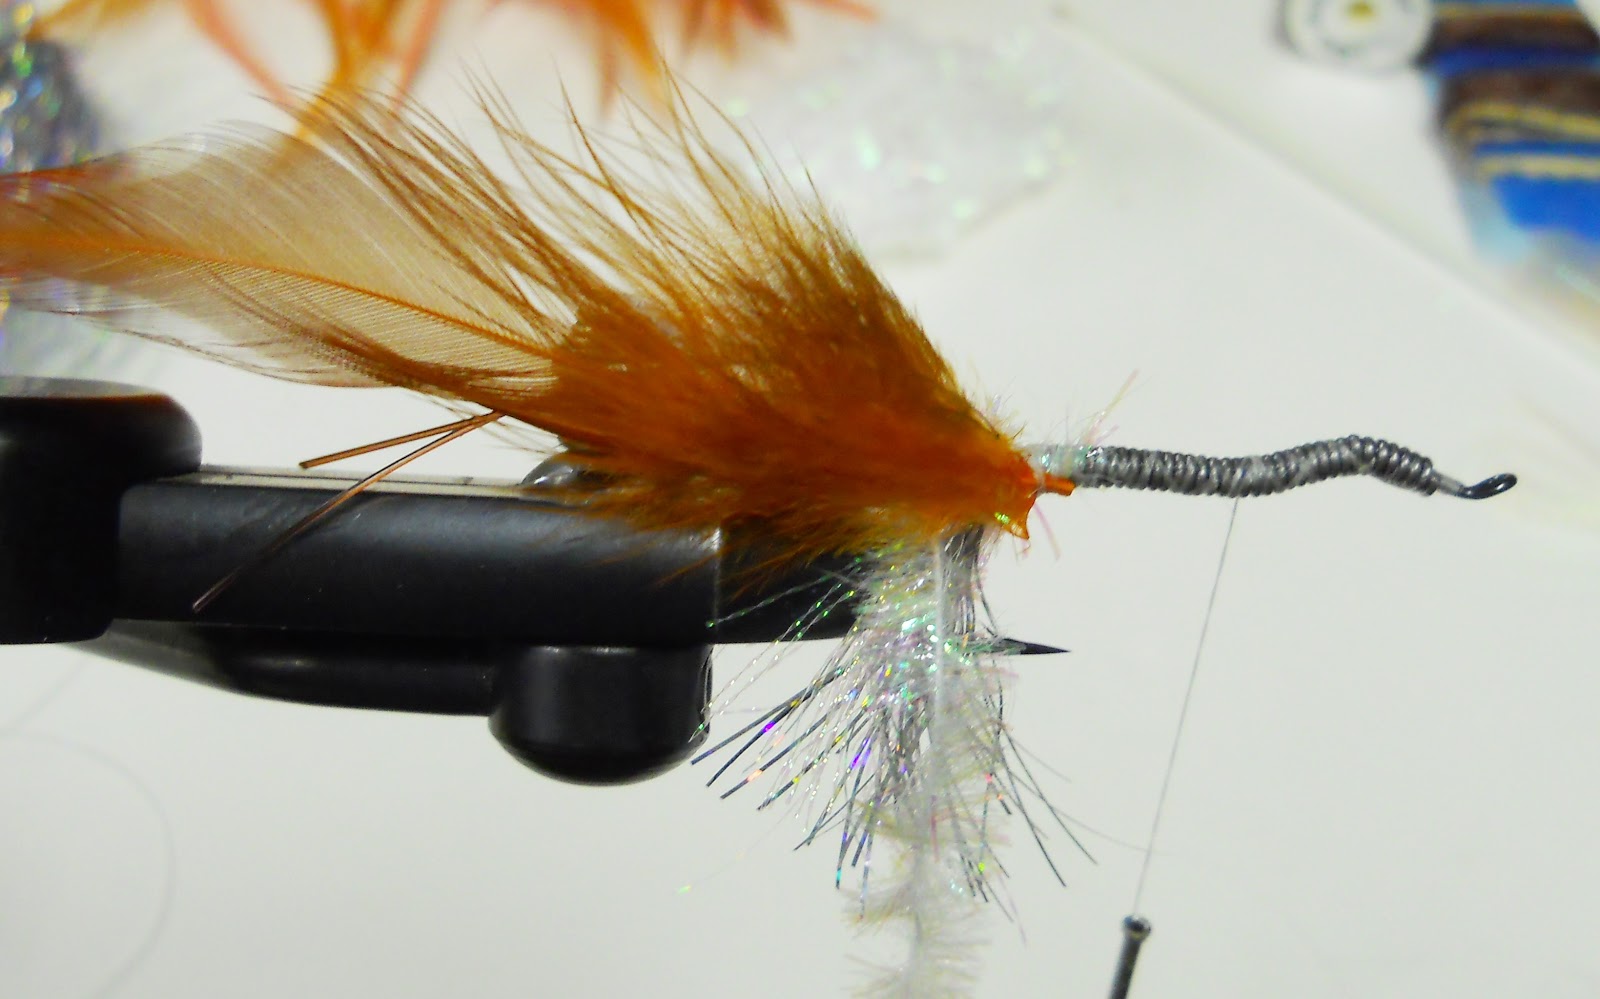
The crystal flash chenille and the hackle are tied down at the same place, and the thread wrapped up to the first bend of the dog-leg.

Wrap the chenille up to the first bend, tie it down and tie in a 4 inch length of wire for the tail segments.

Finish wrapping the thread and then the chenille to the eye, tie down the chenille.

Palmer the hackle to the eye and tie it down.

Prepare the shell by cutting a piece of Mylar film or scud back as shown above, it should be as long as the hook including the bend of the hook to the point. There is a small slit in the narrow section to allow the eye of the hook to pass through. The small, triangular end will form the tail of the shrimp.

Slip the eye of the hook though the small slit in the Mylar, at the base of the tail, tie the Mylar down. Starting at the first bend in the tail, wrap the brass wire, evenly spaced, around the tail section to the eye of the hook to form segments, tie the wire down and whip finish your thread.

The Mylar "shell" is held in place by my hackle pliers (viewed from the top). I have pierced through the body of the fly with my dubbing needle above the hook and about 2/3rds the length of the shank from the eye of the hook. A short section of monofilament is slid through the hole in the body. It helps make a tougher fly if a good helping of head cement is put under the "head" end of the Mylar "shell" before it is fastened down.

A black glass bead is slid onto the mono on each side of the head for eyes. The mono. is trimmed to about 1/4 inch on each side, and the ends melted with lighter to be flush with the glass bead.

The finished fly.

How many shrimp are in a plethora?
Next, I tied some articulated shrimp, hopefully for bigger game fish, halibut and ling cod, maybe.

These are tied essentially the same way with just a few exceptions. I began by putting a bend up in the hook shank about 1/4 inch from the eye.

The antennae, claws and lead are done the same way as before, two strands of 30 Lb. mono are added at the eye of the hook for the joint of the articulation.

The flashabou, the crystal flash chenille and the hackle are wrapped just like before all the way to the eye, the brass wire is tied in at the bend 1/4 inch from the eye.

The tail section is formed with a No. 4 or 6 scud hook, it is attached to the primary hook eye-to-eye by the monofilament we provided on the primary hook and lead is wrapped.

The chenille and hackle are wrapped to cover the lead and Mylar film for the shell is tied down at the bottom of the lead. I am using a cautery tool to remove unwanted material from around the eye of the primary hook to provide better access to it when the fly is finished.

The Mylar film is fastened down like before, the eye of the primary hook is poked through the Mylar at the joint, the barb of the secondary hook is clipped off and the fly is finished. This one is about five inches long, not including the claws.

This is a good start on the way to tying enough for the summer and fall.
Next time, tying crabs, herring and needle fish and learning to catch trout, salmon and char through the ice during a scud bloom.


No comments:
Post a Comment